Javauto is an automation language, unique due to its ability to
perform mouse clicks, simulate keyboard input, and perform pixel
searches.
It compiles to executable code that runs on the JVM (Java
Virtual Machine), so any program you write will be cross
platform.
Keep reading for install instructions and code examples.
This getting started guide covers the first steps of learning
Javauto. Check out the learn
by example section for more topics and tutorials.
Linux, Windows and Mac Installation
Automated installers for these platforms are coming soon, until then you'll need to install manually.
In order to run and compile Javauto code you must have the most
currentJDK
installed. If you have an older version of the JDK installed we
advise updating to the newest version.
First you need to open a text editor that handles normal text.
This could be Notepad, Notepad++, gedit,
vim, emacs, nano, or
whichever editor you would like to use -- as long as the editor
saves in plain text format and not rich text
format.
You can download a syntax highlighting and auto completion for Javauto files in Notepad++
This Hello World program is going to be a little bit different
from those of other languages. We're going to launch a message
box, control the mouse, and print to the command line.
Either copy and paste or type the following into your text
editor. Feel free to modify it and see what happens!
Go ahead and save this as hello.javauto
Note that Javauto file names must start with letters,
cannot contain spaces, and must end in either .javauto
or .ja
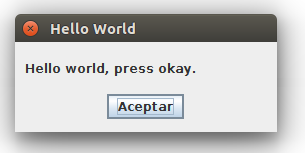
msgBox("Hello world, press okay.", "Hello World"); // show message
mouseMove(0,0); // move the mouse to 0, 0
print("All finished!"); // print to the command line
Now compile it using this command
$ java -jar javauto.jar hello.javauto
If you want to see all the steps the compiler is taking, you
can run it with the verbose flag. This is especially useful when
determining what has caused an error.
$ java -jar javauto.jar -v hello.javauto
Now that you have compiled your program, there will be a file
called hello.jar, you can run this file either by
double clicking it or invoking it from the command line:
To launch the helper run $ java -jar javauto-helper.jar
This should launch a window that looks like this:
The Mouse Coordinates field is self explanatory, and the other
fields will be covered in greater depth later on.
Sometimes it's useful to freeze the helper to keep the mouse
coordinates that are on the screen, to do this press F8
while the cursor is in the mouse coordinates text
field.
Colors
When working with colors you will usually want the integer
value, however you can convert from an R,G,B format to a single
integer format using rgbGetInt( int r, int g, int b ).
For instance, in the screenshot above, if you were to perform a
pixel search for a pixel matching the one that the cursor is
over you could do it in either of the two ways below.
int[] result = pixelSearch(-1317151);
int color = rgbGetInt(235, 230, 225);
int[] result = pixelSearch(color);
setSpeed
is used to control how fast mouse and keyboard events occur.
Manipulating the Mouse
For the purposes of this example use the helper
to find the coordinates of an object to click on.
In this case, the coordinates of the blue arrow to the left are
( 837, 287 ).
If we want a script that will click on this arrow we can try
something like this:
mouseClick("left", 837, 287); // click the left mouse button at (837, 287)
Conversely, if we want to right click on the arrow we would use
this:
mouseClick("right", 837, 287); // click the right mouse button at (837, 287)
If we just want to move the mouse cursor over this blue arrow
we can try something like this:
mouseMove(837, 287); // move the mouse to (837, 287)
Note that we can set the speed that the mouse moves from point
to point with setSpeed. The default speed
is 95%. To get the current speed you can use getSpeed,
so print(getSpeed()); by itself will output 0.95
If the speed is set to 100% (setSpeed(1.0)) mouse
movements will take place instantly.
Simulating Keyboard Input
Simulating keyboard input is very simple, the below example
will work exactly as if you're typing on your keyboard.
send("This command will type all this text and press enter{ENTER}"); // type some stuff and press enter
For this example we will create a blank text file and open it
in our default editor so that you can easily see the keyboard
input in action.
However, a text input field does not have to be in focus to use
these commands; it is as if you are sitting at your computer
pressing keys.
Go ahead and try running this example:
fileCreate("blanktext.txt"); // create a new text file
open("blanktext.txt"); // open our text file with the default program
sleep(1500);

send("This looks like it is being typed really really fast!"); // simulate some typing
send("{ENTER}"); // press enter
send("{TAB}This is an indented line.{ENTER}"); // press tab and then type some stuff

setSpeed(.75); // set the typing (and mouse movement) speed to 75%
send("This is being typed at 75% speed."); // type some more text
Running this example will reveal two important things to know
about sending keyboard input: the speed can be increased
or decreased with setSpeed and there are
strings such as "{ENTER}" that represent special
keys.
Now let's say we want to save this file. On many editors this
can be done by pressing Ctrl + s.
We're going to use the keyCombo
function for this one. We need to create a string array(String[])
where each indice is one of the keys in the combination. Based
on the list of
special keys we know that we can represent the Ctrl
key with the string "{CTRL}". So we can define our
key array as:
String[] keys = {"{CTRL}", "s"};
Then we can send this combination:
keyCombo(keys); // hold down CTRL, press s, release CTRL
Or if we want to do it with one line:
keyCombo( new String[] {"{CTRL}", "s"} );
Similarly, if we want to send Ctrl + Alt + Delete, we could use this:
keyCombo( new String[] {"{CTRL}", "{ALT}", "{DELETE}"} );